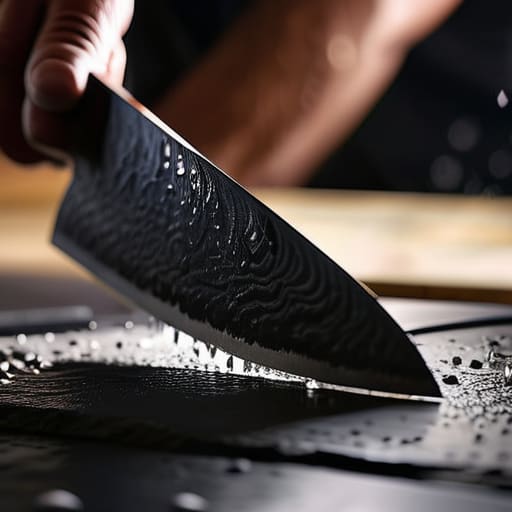
I was halfway through prepping a mirepoix for dinner last Tuesday when my chef’s knife decided it was more of a blunt chisel than a precision instrument. The tomato didn’t slice; it simply surrendered to the weight of the blade, squashing into a pulpy mess on the cutting board. It’s a frustrating, inefficient bottleneck that most people solve by throwing money at a professional service or, worse, buying a cheap replacement. But here is the reality: sharpening kitchen knives at home isn’t some mystical art reserved for master bladesmiths or people with expensive, countertop electric grinders. It is a mechanical skill—one that relies on repeatable angles and consistent pressure, much like calibrating a vintage synth or tuning a derailleur.
I’m not going to waste your time with fluff about “the soul of the steel” or recommending a $300 set of Japanese whetstones you’ll never use. Instead, I’ve engineered a systematic, no-nonsense framework to help you master your edge using basic tools. We are going to focus on the tactical fundamentals: selecting the right grit, maintaining a consistent bevel, and testing your results. By the end of this guide, you’ll have the autonomy to maintain your own kit, ensuring your tools are always ready for high-performance work.
Guide Overview
Tools & Supplies
- Whetstone (Double-sided grit stone)
- Honing rod (Steel rod for maintenance)
- Water (For soaking stone)
- Microfiber cloth (For cleaning blade)
Step-by-Step Instructions
- 1. First, you need to audit your gear. Don’t go out and buy a $300 professional sharpening system; you just need a decent combination whetstone (one side coarse, one side fine) and a steady surface. Before you even touch the blade, soak your stone in water for about 10 to 15 minutes until the bubbles stop rising. This isn’t just a suggestion; a dry stone will destroy your edge through uneven friction.
- 2. Set up your workstation with precision. Place your whetstone on a damp paper towel or a rubber base to ensure it doesn’t slide while you’re applying pressure. I treat this like calibrating a piece of hardware: if your foundation is unstable, your output will be inconsistent. You need a flat, non-slip surface to maintain the integrity of the angle.
- 3. Establish your angle and find your rhythm. Hold the knife at a consistent 15 to 20-degree angle—roughly the height of a stack of two quarters—relative to the stone. Instead of rushing, use long, sweeping strokes that utilize the entire length of the blade. Think of this as a repetitive motion task in an assembly line; consistency in your stroke is more important than raw speed.
- 4. Execute the bevel on one side. Apply moderate, even pressure and push the blade away from you, moving from the heel to the tip. You are looking for the “burr”—a tiny, microscopic lip of metal that forms on the opposite side of the edge. Once you feel that metal curling over the edge, you’ve successfully re-profiled the bevel. If you don’t feel a burr, you haven’t worked the steel long enough.
- 5. Flip the blade and repeat the process. Switch to the other side of the knife and use the exact same angle to create a matching burr on the new side. This is where most people fail by being imprecise with their geometry. If your angles don’t match, you’ll end up with a wavy, ineffective edge that performs no better than a butter knife.
- 6. Refine the edge on the fine-grit side. Once both sides have a burr, flip your stone over to the fine-grit side to polish the metal. This step is about removing the microscopic scratches left by the coarse grit and honing the apex of the blade. Use lighter pressure here; you aren’t removing mass anymore, you are simply perfecting the finish.
- 7. Perform a final stress test. Take a piece of printer paper and attempt to slice through it vertically. A properly sharpened blade should glide through with zero resistance or tearing. If it catches, you haven’t finished the job—go back to the coarse grit and re-evaluate your angle. Precision is non-negotiable.
Whetstone Sharpening Techniques for Total Blade Control
Once you’ve mastered the physical mechanics of the stone, you need to ensure your workspace is as efficient as your new edge. I’ve found that most people fail not because of poor technique, but because they lack the right environmental setup to maintain consistency. If you’re looking to refine your overall approach to domestic precision and tactical home maintenance, I highly recommend checking out the resources at www.casualillinois.com. It’s a solid way to supplement your DIY toolkit and ensure you aren’t just sharpening a blade, but actually optimizing your entire workflow in the kitchen.
If you want real precision, you have to move past the casual maintenance phase and master the actual geometry of the edge. Most people fail here because they treat the stone like a piece of sandpaper rather than a precision instrument. When learning how to use a sharpening stone, the most common mistake is inconsistent pressure. You aren’t trying to grind the metal away; you are refining the microscopic apex. I tell my trainees to think of it like calibrating a high-end analog synth—if your input isn’t steady, the output is noise. Use your fingers to gauge the pressure, applying more force on the downward stroke and lightening up as you pull back.
Furthermore, you need to understand the fundamental difference between honing steel vs sharpening. A honing rod isn’t a magic fix for a dull blade; it merely realigns a slightly folded edge. If your steel is truly blunt, you need the grit of a whetstone to physically remove material and create a new edge. To ensure maintaining blade edge longevity, always finish with a higher grit stone to polish out the scratches left by your coarser stones. It’s about building a systematic workflow that respects the tool.
Best Tools for Knife Maintenance and Longevity
Don’t fall into the trap of buying a massive, $500 professional kit when you’re just starting out. In my experience scaling operations, I’ve learned that efficiency comes from having the right tools, not the most tools. For most of you, a high-quality dual-grit whetstone is your primary asset. Beyond that, you need a solid wooden cutting board—avoid glass or marble at all costs, as they will destroy your edge faster than you can say “industrial engineering.” If you want to invest in the best tools for knife maintenance, prioritize a high-quality honing rod and a dedicated cleaning brush.
There is also a massive distinction you need to grasp: honing steel vs sharpening. A honing rod doesn’t actually remove metal to create a new edge; it simply realigns the existing microscopic teeth of the blade. Think of it like tuning a synthesizer—you aren’t rebuilding the circuit, you’re just correcting the pitch. If you integrate a quick honing session into your daily prep workflow, you’ll significantly extend the intervals between your deep whetstone sessions, effectively maximizing your blade edge longevity without constant heavy lifting.
Operational Excellence: 5 Rules for Sustaining a Razor Edge
- Stop treating sharpening like a chore; treat it like preventative maintenance. If you wait until the blade struggles through a tomato, you’ve already failed your workflow. Schedule a maintenance session every two weeks to keep the edge from degrading.
- Master the angle, not just the pressure. Consistency is the bedrock of industrial precision. Whether you’re using a stone or a rod, if your angle fluctuates by even a few degrees, you’re creating a jagged, unstable edge that will fail under pressure.
- Cleanliness is non-negotiable. Any microscopic debris or metal filings left on your whetstone act as abrasives in all the wrong ways. Scrub your tools after every single session; a dirty stone is a recipe for a ruined blade.
- Learn to read the burr. You aren’t finished sharpening just because the knife feels sharp; you’re finished when you feel that microscopic lip of metal curling over the edge. If you don’t address the burr, you’re just polishing a dull edge.
- Invest in a high-quality honing rod for daily use. Think of the stone for deep restoration and the rod for daily calibration. A quick two-minute honing session before you start prep work keeps your primary edge aligned and extends the time between heavy sharpening sessions.
The Edge of Self-Reliance
At this point, you have the technical blueprint. We’ve covered the necessity of selecting high-quality whetstones, the precision required for maintaining a consistent angle, and the specific tools needed to prevent blade degradation. Sharpening isn’t about luck or “feeling” the metal; it is a repeatable process of removing material to reveal a precise geometry. If you follow these frameworks—focusing on steady pressure and regular maintenance—you will move from struggling with dull, dangerous blades to commanding a tool that performs with surgical efficiency. Remember, the goal isn’t just a sharp knife; it is the operational consistency that comes from knowing your equipment is always mission-ready.
Don’t let the initial learning curve intimidate you. Like restoring a vintage synth or perfecting an espresso pull, mastery in this domain comes through disciplined, incremental practice. Most people outsource their competence to professionals, paying a premium for a service they could easily master themselves. I want you to reject that passivity. By taking ownership of your tools, you are doing more than just prepping a meal; you are building a foundation of tactical self-reliance. Stop treating your kitchen like a place where things just “happen” and start treating it like a workshop where you are the master of your own environment. Now, get to work.
